If during your routine observations of your koi you see any damage to the body or fins or the start of any ulceration, lesions, raised scales etc., resulting from mechanical impact, bacterial or parasitic action, these should be dealt with as soon as possible. Should remedy not be undertaken at an early stage, there is a likelihood of the damage site increasing in severity leading to extensive tissue damage and possible systemic infection and septicaemia. This can disable the vital organs leading to finally, the loss of your Koi.
Fin rot which is a general term for loss of fin tissue will be dealt with further in this section. However again, if this not dealt with effectively, it will continue to destroy the entire fin and fin rays until it eventually infects the body tissue of your Koi.
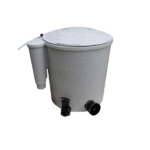
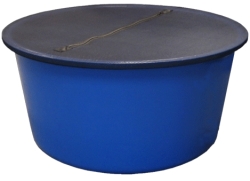
In order to ‘Topically Treat’ your Koi, raise and bowl-up your fish as shown in Section 12.
Before you commence any treatment, thoroughly examine your Koi. This should not just be limited to the site to be treated but turn the fish over and examine the underside for reddening or tissue damage. A mirror can also be used for underside inspection if you do not wish to invert the Koi.Whilst your Koi is inverted, carefully open the gill covers using gentle pressure from your thumb on the underside of the fish adjacent to the gill openings. The gill plates (lamellae) should be dark red in colour (a bit like a piece of liver!). Look for parasite (edge damage), chemical (discolouration) and bacterial damage (decayed tissue, growths etc) and also for congestion (a build-up of mucous on the gill plates caused by irritation which will restrict the in-take of dissolved oxygen into the bloodstream).
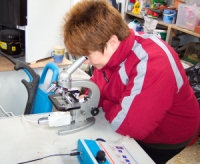
Whilst the Koi is bowled-up, take a mucus scrape on the body just behind the gill cover (operculum) and check for parasitic activity. With experience, you will be able to take a mucus swap using a moist cotton bud from the inside of the gill cover but never touch the gill plates as they are easily damaged – this is not recommended for the novice. Your microscope (if you have or can borrow one) will become with experience, a very valuable aid.
Salt Dips
 The are times after the examination of your Koi that it is evident that a salt dip would be beneficial. It may be to clear congested gills or to ‘knock-back’ or hold a parasitic problem until such time as the Koi is able to undergo further treatment. It is often the case that you will need to deal with not one but several problems. In these circumstances, you must tackle the most ‘life threatening’ problem first (such as a deep bacterial ulceration) and deal with a parasite infestation later. However, in cases such as Costia (which can cause havoc with your Koi’s cardio vascular system), immediate ‘holding’ measures should also be taken at the same time via salt dips.
Two bowls should be used whenever carrying out any dips – the first bowl used for the medication process and the second bowl filled with un-treated pond (or tank) water. Should there be a need to curtail the treatment whilst it is in progress, you can immediately raise the Koi and return it to the fresh water container.To undertake the salt dip, fill the first bowl with a measured amount of pond water (or from the water source where the Koi was removed) to a sufficient depth to cover the complete fish. Add salt at the rate of 3 ounces per gallon of water and mix well. Insert an air stone into the water. Carefully place the Koi into the saline solution and leave in the dip for between 10 to 20 minutes, depending upon how the fish copes with the treatment. Should gill disease be suspected, use a far weaker solution (1.5oz @ 10 mins).
Should the Koi become very stressed or go on its side and stay in this position (usually indicating a respiratory problem), it should be removed from the dip and returned to the second bowl containing the un-medicated water. After a few minutes, the dip treatment can be repeated (sometimes your Koi will settle down) and if the same result occurs, the dip can be diluted with fresh pond water. Very occasionally, it is necessary to use judgement between the possible ‘lifesaving’ benefits of the dip against the effects of stressing. However, never leave your Koi ‘on its side’ in the medication.
Upon completion of the dip, return your Koi to the bowl of un-treated water to recover prior to any further work, or its return to the pond. If use of an anaesthetic is required for the next stage of treatment, leave for 20 to 30 minutes to clear any residual salt traces before sedating. An air stone should also be placed in the water and the bowl netted.
Whenever undertaking any dip, NEVER LEAVE YOUR KOI UNATTENDED.
Minor Damage
Readily accessible minor damage to your Koi can be treated without anaesthising. You will require a bactericide (for body treatments), potassium permanganate (for fin damage), protective gloves and cotton buds.
Bowl-up your Koi, gently raise the fish with your hand underneath and dab the bactericide on the damaged area on the body, covering well. In cases of minor fin damage, use a very strong solution of potassium permanganate on the area requiring treatment. Allow to dry for as long as your Koi will allow you to!
For loose or dead scales, these can easily be removed using a cotton bud, carefully swabbing the area with a bactericide upon completion.
When working in inaccessible areas or when the treatment is likely to stress the Koi (you do not want your Koi flapping around all over the place which may result in further damage), a light sedation should be used.
We always prefer to use a liquid treatment applied by cotton bud in lieu of a spray aerosol as you can control the contact area of the medication. Always wear protective gloves when applying topical treatments.